


 Live Chat
Table of Content
The coronavirus outbreak has made it necessary to work from home. Most companies have relocated their computers to their employee’s place. Some, however, have not been able to do so due to concerns surrounding the security of data. But these organizations haven’t failed at providing the convenience of work from home to their staff. This, though great, comes at the cost of remote connection. Means, the employees are expected to have their own desktop PC and access work computer remotely.
Accessing a work computer from your place is more complex than it seems at first. Organizations have several security measures at place that make it even more difficult.
Put simply, for a novice accessing a PC on-site could be even more daunting but we are here to help.
In this blog, I will take you through two methods by which you can easily gain access to your work computer without worries. So stay tuned.
Accessing your work computer remotely
Method 1
Setting up a Virtual Private Network (VPN)
- Get required permissions
Some companies require that you setup a remote connection to access your work computer. You may need to request permission across the VPN.
Get in touch with your IT department and ask them to grant you access.
Depending upon the level of access you seek the IT may be able to help immediately or in some time. Note that the IT department may need to obtain certain permissions as well. After all, it is their job to ensure that you only know what you need to know.
The IT might ask you to get the same approved from your supervisor so you better contact your manager to expedite the process.
You will probably need to provide your username and password to request access.
- Install VPN Application On Your Computer
This is essential because without a VPN your computer won’t have the host to access the network.
Different companies have different VPNs configured. So, the best practice is to ask your organization which application you should install.
Some companies have their own programs too; check the website and get in touch with your IT SPOC and ask him to send you the download link – it won’t get any simpler.
- Install the same VPN client on your work computer.
You need the VPN client installed in both home and work computer. Though it might not be technically possible for you to install VPN, given that you are at home, you can contact someone from your team or the IT administrator itself.
Follow the necessary instruction set. Different applications install in different ways so make sure you read instructions for the correct OS.
- Open VPN
Once the VPN client has installed you will notice that a directory has been created. An icon will also appear in your home screen (desktop) if you chose the right option during installation.
It is about time that you opened the VPN and initiated the connection.
Go to start > programs and you will see the VPN appear in the list among other applications.
But before you do so, you may be required to authenticate or even activate the VPN client. Enter username and password in the screen if prompted.
For Mac, you need to go to the Applications folder and then launch the VPN client.
The VPN may automatically connect to the work PC right after you install it on your computer. However, this may vary depending upon the company’s policies.
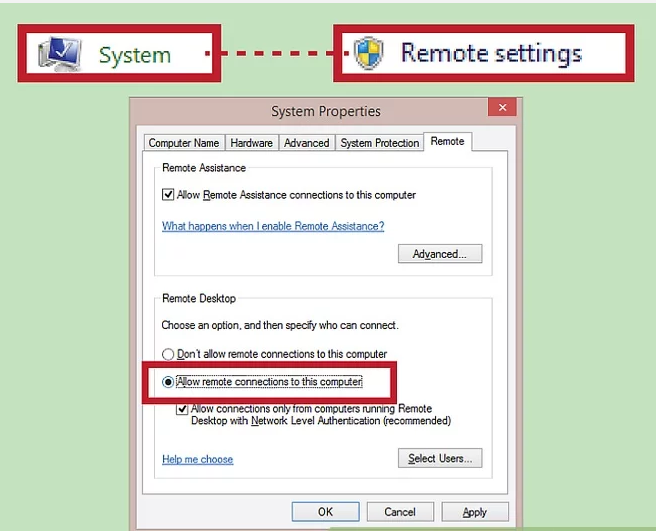
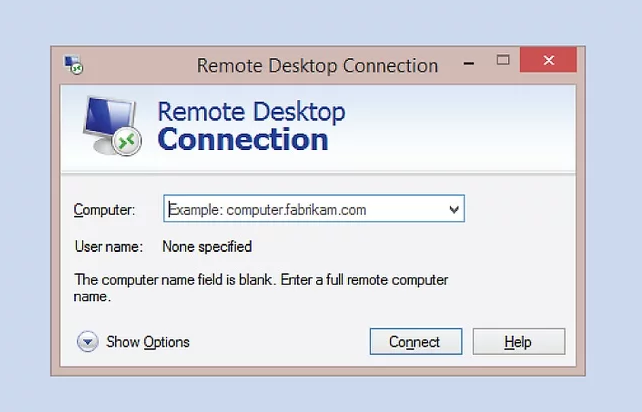
- Enabling Remote Desktop on your office PC
Remote Desktop allows computers to connect with one another.
Both Mac and Windows come with this feature.
Windows users can access Remote Desktop Connection (RDC) through –
Start→ Control Panel→ System→ Remote Desktop
Now you need to check the box “Allow users to connect remotely to this computer.” You will need to connect the computer to the internet, how else would you connect to a computer miles away from your location.
Note that we are doing all this on your work computer and not the home PC. Do not make these changes to your own computer as they aren’t going to help you.
For Mac, the remote desktop does not come pre-built, as always, so head on to the Mac App Store and download “Microsoft Remote Desktop”.
- Leave Your Work PC On When You Leave
This is essential. Your work PC can connect to you automatically but it cannot turn on by itself.
Also, the computer needs to be connected to the network to be accessible. So, launch the remote access software that you have installed, although this might not be required in some cases.
- Check System Compatibility
Your home PC might not be near as powerful as your work computer, so do check whether the VPN software is compatible or not.
Ideally, you shouldn’t have a problem because most VPNs can work on computers with specifications as low as 1GB RAM and less than a GB disk space. The programs are relatively lighter because the developers know that heavier the programs, lesser the people will use it.
Mac and Windows will have different system requirements for the same application because the underlying architecture is different for both.
Detailed requirements can be obtained from the product site.
- Download the virtual private network client to your home computer
Install the VPN client on your home PC the same way you installed it on your computer. The installation is self-guided and if you are a seasoned computer user, you will have zero troubles doing so.
You can use Windows connection on Mac and Mac on Windows. In short, it does not matter which OS is configured on which PC.
Your IT department will do all the things for you, if however, they do not do so, they may allow you to take home the VPN program.
- Launch the client on your home PC
You are halfway through. Now launch the client on your home computer the same way you launched it on your office computer.
Go to start, then programs and find a VPN where the software may have been installed.
Login to the VPN before trying to remote connect with your work PC.
This isn’t going to be as fast as other applications.
The files that you are sending and receiving are encrypted so you might feel like the connection is slow but it is not – it takes time to encrypt and decrypt files between your office and home PC.
- Caution –
Even though you are on your home computer, your employer may be able to see all the activities when you use a VPN. If you need to browse through personal stuff, minimize the remote connection window.
Method 2
Getting Remote Access without an IT Department
Smaller organizations do not have a dedicated IT department. If so is the case with your company as well you can still share files between your home and work PC.
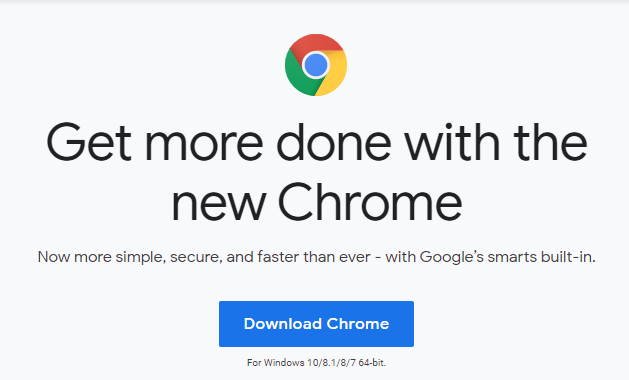
Try running the Chrome Remote Desktop. Chrome Remote Desktop is a free-to-use app that lets you connect computers seamlessly.
It is available for both Windows and Mac, though you can only run it on Google Chrome. So if you haven’t installed the browser yet, it is about time you did so.
Install CRD (Chrome remote desktop) on the computers that you would like to interconnect. There is no multi-way connection possible with CRD. A computer can connect with another computer and that is it, multi-connectivity isn’t achievable.
Chrome remote desktop isn’t an application exactly. It is an extension configured over an existing Chrome Browser.
You can add extensions by visiting the chrome extensions page. Clicking on Add to Chrome will deploy the extension on your local Chrome.
We have included a screenshot below.
Authorize Chrome remote desktop. This is a requisite. The first time you open the extension it will ask you to authorize the same. Authorization allows the applications to connect to each other. This will enable the computers to converse with one another.
The extension will ask you to authorize only once. So this is not going to be as troublesome as it seems.
Now, enable remote access to your computer. You cannot remote connect with Chrome remote desktop if you do not have a google account in the first place, so create one.
Click apps under the chrome search bar. Open CRD. In the “My Computers” option that appears next, click “Get Started”. You now need to “enable remote connections”
Install the Chrome Remote host service.

If you are on Windows, enter a PIN of your choice, click “yes” to install the host.
The host service downloads and installs automatically. Once the installation is complete, confirm the Google Account that you want to configure and click “Ok”.
Enable remote access to your computer. Create a Google Account if you do not already have one. Open a new tab in Google Chrome, click “Apps” under the Chrome search bar, and open the Chrome Remote Desktop app. In the “My Computers” box, click “Get Started,” and then click “enable remote connections.” Now install the Chrome Remote Host Service.
After installing the host, confirm your Google account and enter your PIN again. The computer that you enabled should have been listed by now.
See whether the enabled computers are visible under the “My Computers” section.
You cannot install the host without admin access so obtain the same from.
For Mac Users
Chrome will begin the download and installation of .dmg. Click “save” and then click on “chrome remote desktop.dmg” from the “downloads” bar.
You can use the finder to locate the file. Double click when you find it.
Follow the instructions on the screen and select the options that prompt next. Confirm the PIN and click “OK”.
A preference dialog box will now appear from where you will need to confirm your PIN and the account configured with it. Once done, “Remote connections for this computer have been enabled” will flash on the screen.
Access Your Computer
As you may have understood by now, the computer that you are accessing needs to be turned on. Also, connect the PCs to the network if not already connected.
Open a new tab. Always initiate chrome desktop connections from a new tab. this way your current work will not be overridden by the remote computer that will appear on the screen.
In the new tab that you have opened, click on Apps and open CRD (Chrome Remote Desktop) app. Click on “Get Started” in the “My Computers” tab.
Choose the computer that you want to access. Enter the PIN that you had set on that computer and click “Connect”.
End the Remote Session
You can end the remote session anytime you want. To do so, place the mouse in the drop-down at top-centre and click “Disconnect.”
This will end your remote connections then and there.
Now with all the setup done, share access with your colleagues. You can share the PIN and computer ID or do so from the Chrome Remote Desktop itself.
Open the app on the computer and click “Remote Assistance” box. Now click the “Share button”. You will receive a unique access code that you can share with multiple people.

Once those people enter the code, they can see what’s on your computer screen, so be careful who you share these credentials with. The access code can be used only once for a single session. It is similar to working with Team Viewer or other Screen Share apps except that guests cannot do a thing on your computer.
Clicking “stop sharing” will end the screen share. On Mac, you should press Opt+Ctrl+Esc. The Windows shortcut key is a combination of Ctrl, Alt, Esc. Means, pressing Ctrl+Alt+Esc together will end the session.
Precaution is necessary
Always be careful while granting remote access or sharing screen with another user. When you close the session make sure that it has been properly closed.
Unclosed sessions may cause privacy breach. The last thing you would want is colleagues spying on your work just because you were too careless to notice.