Table of Content
There could be a number of reasons you would want to move your files from one cloud to another. People mostly move files to new hosts when their cloud storage is full. While freeing up space on your cloud is one of the potential solutions, most people have no idea how to delete cloud storage. Besides, deleting your files could give rise to the following key issues –
You could accidentally delete an important system file and your website might fail to load.
If you have an abnormally high number of files on your cloud, it might take ages to choose which files to delete and which ones to keep.
Thus, you can have countless reasons to move files between cloud servers or to the local.
Is cloud storage safe?
Yes, 100%. Unlike physical disks, you cannot misplace clouds. Though one would say that you can lose access to your cloud account, you can quickly regain it too, as long as you can access the registered email.
How to transfer files from one cloud storage service to the other – the traditional process
Before cloud storage providers allowed the transfer of files among hosts, most people downloaded files to the local and later uploaded it to the new host. This approach, although fairly simple, took an immense amount of time.
The amount of bandwidth you would consume would also increase to two times – one while downloading and one while uploading files. If you would instead migrate directly from the servers, you would not only save bandwidth but also time and eventually money.
Problems that arise while migrating from one cloud to another
While migrating files directly from cloud servers, it is very difficult to keep the same folder structure. So you would need to tweak a few settings before you start using the new server.
Secondly, if you have organized your data, you would lose it. The new host may also fail to recognize the file type.

How to move files directly from your servers
Step 1:
Log in to your cloud account and add purchase subscription if you have not purchased already.
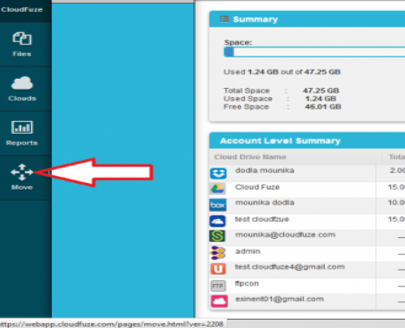
Now click the “add cloud” button. You will be presented with a number of choices. Search for “move” button in the window.

While the options may vary depending on your providers, you would find the move button in almost all hosts.
Step 2:
You can specify the source cloud in the next window. The move button would now prompt you to enter a source from where you will move files.
Click on “source cloud”.

If the interface prompts you to enter the destination cloud, enter it.
Step 3:
Select the structure that you would like to upkeep.
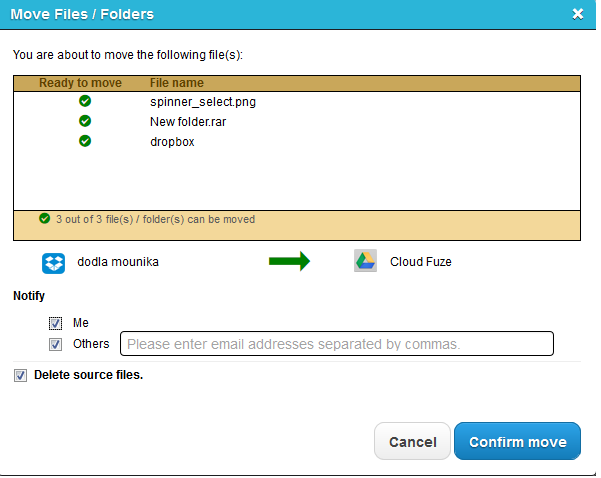
After you have logged in to the destination cloud, select files and folders you wish to move
Step 4:
In the “destination cloud” option, select the folder where you want these files to move.
When done, click “move” and wait until the process is complete.

Step 5:
Verify if the files have moved
There are several ways to verify if the files have indeed moved to the new account.
You can reinitiate a transfer and the system will show you notification that there are files with similar names. Note that not all cloud storage APIs are designed this prudently and you may not be able to verify transactions using this method.
The second and more reliable option is to check the transaction screen of your cloud. The files that have been moved would most probably be listed and you would not need to move them again.
If you want to demo a cloud server, you can sign up on the link provided. Signup with your mail and start running virtual machines in a matter of minutes.


 Live Chat