-
 About us
-
 Services
Not Sure what’s right for your business?
Services
Not Sure what’s right for your business? Talk to
Experts
Talk to
Experts
- Dedicated Servers
-
VPS Hosting
- Linux VPS Hosting
- Windows VPS Hosting
- VPS Hosting Pricing
- Managed VPS Hosting
- Self Managed VPS Hosting
- VPN Network
- Ubuntu VPS Hosting
- Forex VPS Hosting
- Free VPS Server Demo & Trial
- Cloud Hosting
-
Server
Colocation
- Rack Space Colocation
- Cage Colocation
- Cabinet Colocation
- Single Server Unit Colo
- Quote for Colocation
-
Data
Center
- Data Centers
- Data Center India
- Data Center Delhi
- Data Center Noida
- Data Center Bangalore
- Data Center Jaipur
- Data Center Chennai
- Virtual Data Center
- Tier 3 Data Center India
- Services
- Data Center Migration
- Data Center Outsourcing
- Data Center Consolidation
- Hardware as a Service
- Data Center Optimization
- Managed Firewall Services
- Security
- Managed Firewall Services
- Managed Security Services
- Web Application Firewall
- SSL Certificates
- DdoS Mitigation
- Disaster Recovery
- DraaS
- DR on Cloud
- BCDR
- Backup as a Service
- Infrastructure Management
-
Email Hosting
-
-
 Platforms
-
 Resources
- Blog
 Live Chat
-

- [email protected] +91-120-6025102


How to clear the DNS Cache on your Computer
Troubleshooting your computer is a daunting task. Especially, when it is about to clear DNS cache.
Fortunately, you can do it smoothly by following a few simple steps. Even you don�t need any technical experience for that. In a few steps, your DNS cache will be flushed out, and you can continue your work.
In this post, we'll explain what a DNS cache is, why
removing a DNS cache is important, and how to clear a DNS cache.
What does clear DNS Cache do?
Clearing a DNS will flush out Domain Name System (DNS) records and any IP addresses from your cache. It can help to resolve issues related to security, internet connectivity, and others.
Substantially, you need to understand that the clearing process of your cache will work automatically in fixed intervals without your intervention.
That's because the DNS cache saves all the information related to identifying and finding websites. Along with, a Time to Live (TTL) component. Specifically, it kept the DNS record for a site valid for some time. During this period, the local cache will answer all the queries to the website without the help of the DNS server. Once the TTL expires, the entry will be eliminated from the cache.
Nonetheless, several reasons make you force to clear a DNS cache instead of waiting for expiring the entries from the TTL. To understand the reason why take a look below.
Why clear a DNS Cache?
It's essential to flush a DNS cache for a few reasons.
1. The cache may contain outdated information
In accessing the websites or applications you might face
difficulty due to outdated information kept in the cache. If the domain name in
the cache points to an incorrect IP address or old information, you won't get
the correct information in return. Even if you clear the history of your
browser, the DNS cache will still have the old information. That�s why the
server needs to flush out all the old information to get the updated results.
2. Privacy
Another reason to clear DNS cache is privacy. Although the DNS cache doesn� contain
the information stored in JavaScript or cookies. But actually, it retains a
history of which addresses you�ve visited recently, including those you go to
regularly. As a result, more information stored means less privacy for the one
who gets access to the cache.
3. Security Reasons
DNS Spoofing is another essential reason for flushing DNS
cache because hackers could poison the DNS to redirect you to a malicious
website. To avoid this issue, regularly purging the cache make you stay safe.
How to clear DNS cache on your computer?
Clearing a DNS cache is a simple process, but the only thing is that it varies depending on the Operating System (OS) you use. It also depends on whether you need to flush it from your computer or your browser.
Learn how to clear DNS cache in Windows, macOS, Linux, and Google Chrome browsers, follow the appropriate procedure below.
How to clear DNS cache for Windows 10
Here�s the process for windows clear DNS cache for Windows 10. You may also follow similar steps for Windows 8.1, Windows 7, and Windows XP versions.
1. Click the Windows logo, placed in the left corner of the screen to start.
2. Select Command Prompt among various applications.
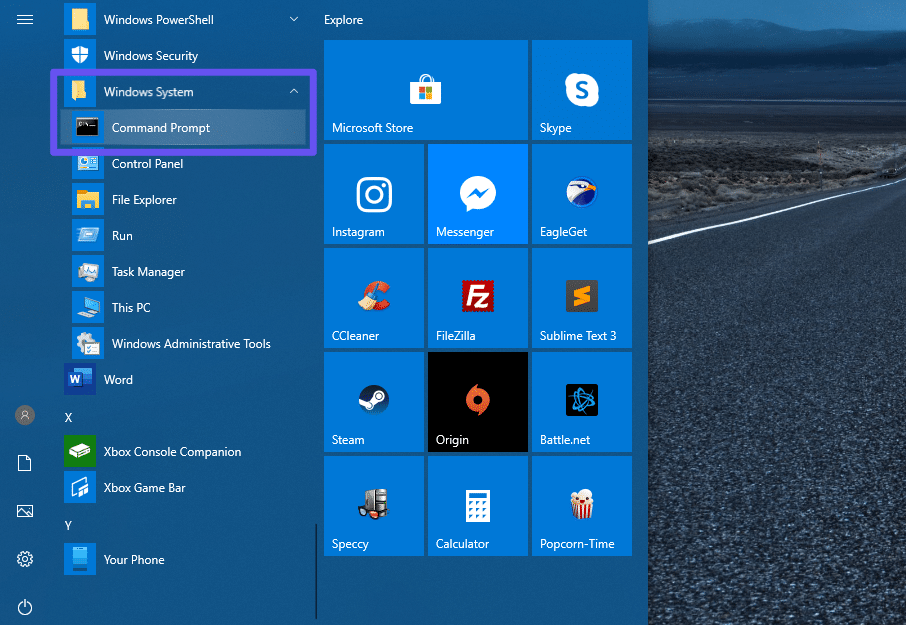
3. You can also open the command prompt by simply pressing Windows + R keys together and then enter cmd on the Run window.
4. You may see a popup window asking a question: if you want to allow Command Prompt to make changes to your computer. If you want to do it, select Yes.
5. If at this point, you are asked for an administrative login, then you�ll need to contact your system administrator to move forward.
6. In the command prompt window, type ipconfig /flushdns.
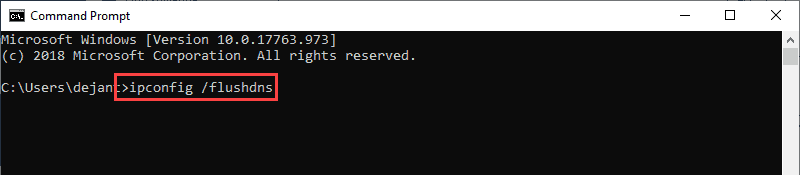
7. Press Enter.
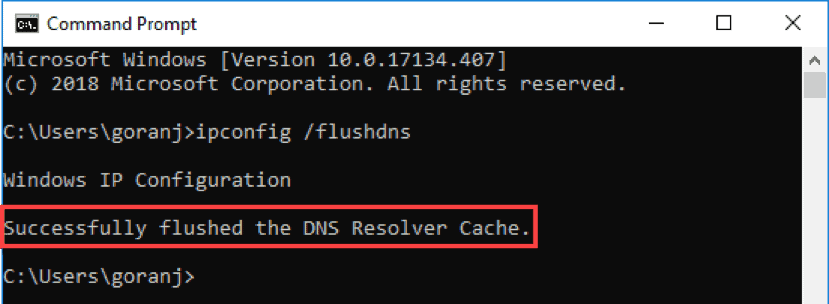
8. Once you entered, you should see a message on the command prompt window, confirming that the DNS Resolver Cache was successfully flushed.
How to
flush DNS cache for Mac OS X
The process for flushing your DNS cache on various software
versions of a Mac computer is similar, no matter what version is running on
your mac. You only need to specify the version type in step 6. Let�s start.
1. Open Finder.
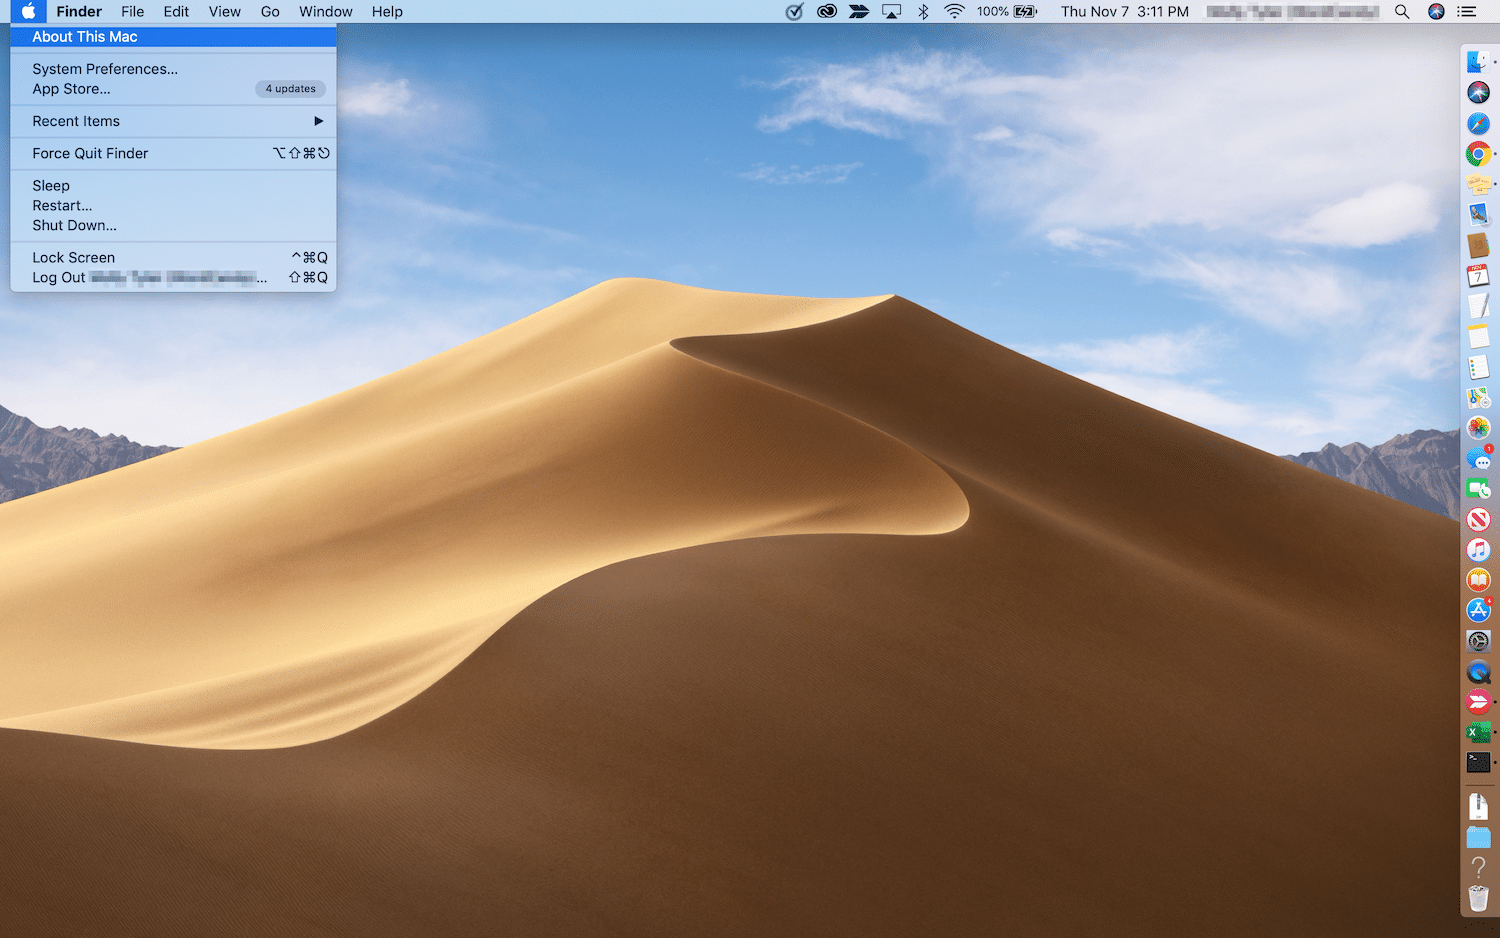
2. Click Applications.
3. Then move to the Go tab, here you find the Utilities
option, and click it.
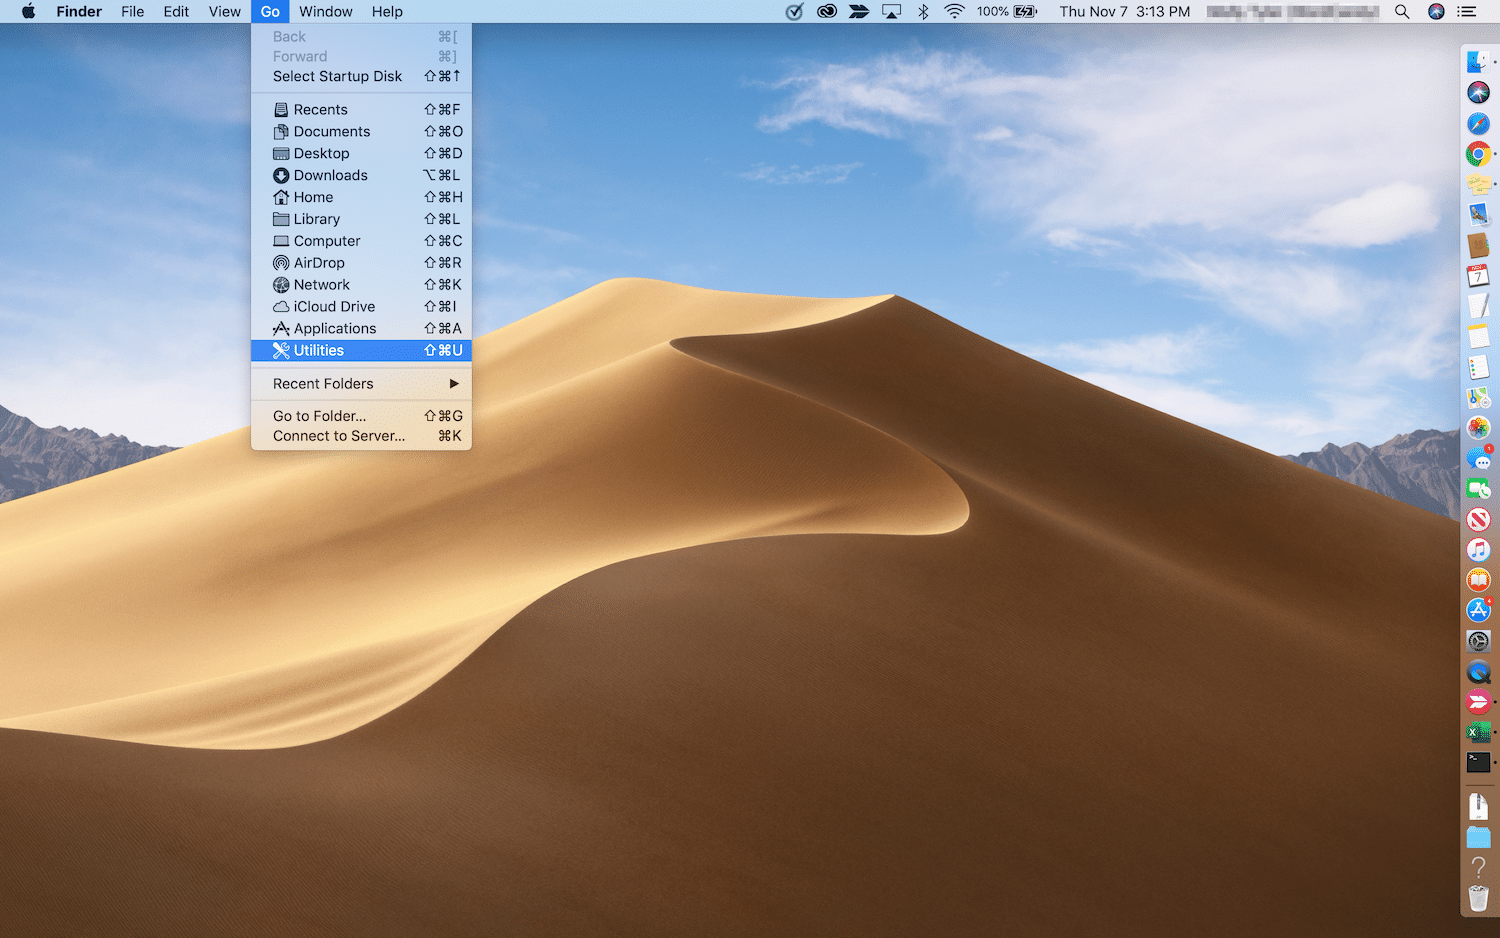
4. Open Terminal.
5. Once Terminal opens, you just go to the Launchpad and open it, and in the search bar type �Terminal�.
6. In the Terminal window, based on your software version,
type any one of the following commands:
?
Lion (10.7), Mountain Lion (10.8), Mavericks (10.9), El
Capitan (10.11), Sierra (10.12), High Sierra (10.13), Mojave (10.14): sudo
killall -HUP mDNSResponder
?
Yosemite (10.10): sudo discoveryutil mdnsflushcache.
?
Leopard (10.5), Snow Leopard (10.6): sudo dscacheutil
-flushcache
?
Tiger (10.4): lookupd -flushcache
7. Enter your password and press Enter again.

8. A message displayed confirming that the DNS cache has been reset.
The list of commands for clearing the DNS cache on most macOS and Mac OS X versions is mentioned in the table below:
|
Mac OS X or macOS version |
Terminal Command |
|
Mojave (version 10.14) |
sudo
killall -HUP mDNSResponder |
|
High
Sierra (version 10.13) |
|
|
Sierra (version 10.12) |
|
|
Mountain
Lion (version 10.8) |
|
|
Lion
(version 10.7) |
|
|
El Capitan
(version 10.11) |
sudo
dscacheutil -flushcache sudo killall
-HUP mDNSResponder |
|
Mavericks
(version 10.9) |
|
|
Yosemite
(version 10.10) |
sudo discoveryutil mdnsflushcache sudo discoveryutil udnsflushcaches |
|
Snow
Leopard (version 10.6) |
sudo
dscacheutil -flushcache |
|
Leopard
(version 10.5) |
|
|
Tiger
(version 10.4) |
lookupd
-flushcache |
How to Flush DNS Cache in Google Chrome
Of course, Google Chrome is not an operating system, but it does keep a DNS cache of its own. This is separate from the cache which is in your operating system and from Chrome�s browser cache. If Chrome is your default web browser then you need to clear DNS cache of Chrome. Check out the process.
1. Enter the following address on your browser�s address
bar:
chrome://net-internals/#dns
2. Click the Clear host cache button.

How to
Flush DNS Cache in Linux
In Contrary to, Windows and Mac computers, Linux systems don�t have a DNS cache by default. However, each distribution might use a distinct DNS service to store DNS records locally. Based on the service, either you clear the cache or reboot the service.
1. To launch a terminal window, Press Ctrl+Alt+T on your keyboard.
2. In the Terminal window, based on the service your Linux
system is running, you can type any of the commands mentioned below:
?
NCSD: sudo /etc/init.d/nscd restart
?
Dnsmasq: sudo /etc/init.d/dnsmasq restart
?
BIND: You may have to try multiple commands:
?
sudo /etc/init.d/named restart
?
sudo rndc restart
?
sudo rndc exec
3. After entering the command, you may be asked for your
password.
4. Probably, the service might stop, but it starts again,
before sending a confirmation message that the cache was successfully reset.
Was this answer helpful?
 9
9
 11
11
9
11
Related Questions
- When will my domain start working?
- What is sub-domain ?
- Can you change my DNS for me? Domain purchased from other company?
- Can I view my site even though my domain's name servers haven't propagated yet?
- What is CNAME?
- How Does DNS Work ?
- How To Create A DNS Forward Lookup Zone?
- How to change nameservers at Google Domains
- What Does chrome://net-internals/#dns Do?
- What DNS Does Chrome Use?
- What DNS Does Chrome Use by Default?
- What is Secure DNS in Chrome?
- What is Google DNS?
- Chrome Net Internals Dns History Delete Not Working A Complete Guide
- How Do I Fix DNS on Google Chrome?
- How to Fix DNS on Chromebook
- What is DNS?
- How to Clear and Debug DNS Cache in chrome://net-internals
- Troubleshooting DNS Issues with Chrome's Net Internals: A Comprehensive Knowledgebase
- How to clear chrome net internals dns error?
Submit your Query
 Browse by Services
- Dedicated Server Hosting
- Dedicated Server Pricing
- Linux Dedicated Server Hosting
- Windows Dedicated Server
- Offshore Dedicated Server
- Plesk Dedicated Server
- Server Rental
- Cloud Hosting India
- Linux Cloud Hosting
- Windows Cloud Hosting
- Cloud Storage Pricing India
- Cloud CDN
- Cloud Migration Services
- SSD Hosting India
- Video Streaming Server
- VPS Hosting India
- Linux VPS Server Hosting
- Buy Windows VPS Hosting
- Ubuntu VPS
- Best Forex VPS
- Buy VPN
- Email Server Hosting
- Zimbra Email Hosting
- Reseller Hosting
- Linux Reseller Hosting
- Windows Reseller Hosting
- Shared Hosting Plans
- Linux Shared Hosting
- Windows Shared Hosting
- Others
- Buy VPS
- Colocation Service India
- Sap Hana Hosting
- SSL Certificate Price India
- Wordpress Hosting India
- Disaster Recovery Services
 Resource Library
What is Cloud ComputingUnderstand the term cloud computing, the ongoing trend, its playing field, future growth and how industry... Myths about Cloud ComputingCloud computing, in the recent years, has become a subject of significant discussion among the industry experts. Download Now |


 Blogs
Blogs